Posts Tagged ‘data security’
Getting the Most Out of Your PHP Log Files: A Practical Guide
It could rightfully be said that logs are one of the most underestimated and underutilized tools at a freelance php developer’s disposal. Despite the wealth of information they can offer, it is not uncommon for logs to be the last place a developer looks when trying to resolve a problem.
In truth, PHP log files should in many cases be the first place to look for clues when problems occur. Often, the information they contain could significantly reduce the amount of time spent pulling out your hair trying to track down a gnarly bug.
But perhaps even more importantly, with a bit of creativity and forethought, your logs files can be leveraged to serve as a valuable source of usage information and analytics. Creative use of log files can help answer questions such as: What browsers are most commonly being used to visit my site? What’s the average response time from my server? What was the percentage of requests to the site root? How has usage changed since we deployed the latest updates? And much, much more.

This article provides a number of tips on how to configure your log files, as well as how to process the information that they contain, in order to maximize the benefit that they provide.
Although this article focuses technically on logging for PHP developers, much of the information presented herein is fairly “technology agnostic” and is relevant to other languages and technology stacks as well.
Note: This article presumes basic familiarity with the Unix shell. For those lacking this knowledge, an Appendix is provided that introduces some of the commands needed for accessing and reading log files on a Unix system.
Our PHP Log File Example Project
As an example project for discussion purposes in this article, we will take Symfony Standard as a working project and we’ll set it up on Debian 7 Wheezy with rsyslogd, nginx, and PHP-FPM.
composer create-project symfony/framework-standard-edition my "2.6.*"
This quickly gives us a working test project with a nice UI.
Tips for Configuring Your Log Files
Here are some pointers on how to configure your log files to help maximize their value.
Error Log Confguration
Error logs represent the most basic form of logging; i.e., capturing additional information and detail when problems occur. So, in an ideal world, you would want there to be no errors and for your error logs to be empty. But when problems do occur (as they invariably do), your error logs should be one of the first stops you make on your debugging trail.
Error logs are typically quite easy to configure.
For one thing, all error and crash messages can be logged in the error log in exactly the same format in which they would otherwise be presented to a user. With some simple configuration, the end user will never need to see those ugly error traces on your site, while devops will be still able to monitor the system and review these error messages in all their gory detail. Here’s how to setup this kind of logging in PHP:
log_errors = On
error_reporting = E_ALL
error_log = /path/to/my/error/log
Another two lines that are important to include in a log file for a live site, to preclude gory levels of error detail from being to presented to users, are:
display_errors = Off
display_startup_errors = Off
System Log (syslog) Confguration
There are many generally compatible implementations of the syslog daemon in the open source world including:
syslogdandsysklogd– most often seen on BSD family systems, CentOS, Mac OS X, and otherssyslog-ng– default for modern Gentoo and SuSE buildsrsyslogd– widely used on the Debian and Fedora families of operating systems
(Note: In this article, we’ll be using rsyslogd for our examples.)
The basic syslog configuration is generally adequate for capturing your log messages in a system-wide log file (normally /var/log/syslog; might also be /var/log/messages or /var/log/system.log depending on the distro you’re using).
The system log provides several log facilities, eight of which (LOG_LOCAL0 through LOG_LOCAL7) are reserved for user-deployed projects. Here, for example, is how you might setup LOG_LOCAL0 to write to 4 separate log files, based on logging level (i.e., error, warning, info, debug):
# /etc/rsyslog.d/my.conf

local0.err      /var/log/my/err.log
local0.warning  /var/log/my/warning.log
local0.info     -/var/log/my/info.log
local0.debug    -/var/log/my/debug.log
Now, whenever you write a log message to LOG_LOCAL0 facility, the error messages will go to /var/log/my/err.log, warning messages will go to /var/log/my/warning.log, and so on. Note, though, that the syslog daemon filters messages for each file based on the rule of “this level and higher”. So, in the example above, all error messages will appear in all four configured files, warning messages will appear in all but the error log, info messages will appear in the info and debug logs, and debug messages will only go to debug.log.
One additional important note; The - signs before the info and debug level files in the above configuration file example indicate that writes to those files should be perfomed asynchronously (since these operations are non-blocking). This is typically fine (and even recommended in most situations) for info and debug logs, but it’s best to have writes to the error log (and most prpobably the warning log as well) be synchronous.
In order to shut down a less important level of logging (e.g., on a production server), you may simply redirect related messages to /dev/null (i.e., to nowhere):
local0.debug /dev/null # -/var/log/my/debug.log
One specific customization that is useful, especially to support some of the PHP log file parsing we’ll be discussing later in this article, is to use tab as the delimiter character in log messages. This can easily be done by adding the following file in /etc/rsyslog.d:
# /etc/rsyslog.d/fixtab.conf

$EscapeControlCharactersOnReceive off
And finally, don’t forget to restart the syslog daemon after you make any configuration changes in order for them to take effect:
service rsyslog restart
Server Log Confguration
Unlike application logs and error logs that you can write to, server logs are exclusively written to by the corresponding server daemons (e.g., web server, database server, etc.) on each request. The only “control” you have over these logs is to the extent that the server allows you to configure its logging functionality. Though there can be a lot to sift through in these files, they are often the only way to get a clear sense of what’s going on “under the hood” with your server.
Let’s deploy our Symfony Standard example application on nginx environment with MySQL storage backend. Here’s the nginx host config we will be using:
server {
    server_name my.log-sandbox;
    root /var/www/my/web;

    location / {
        # try to serve file directly, fallback to app.php
        try_files $uri /app.php$is_args$args;
    }
    # DEV
    # This rule should only be placed on your development environment
    # In production, don't include this and don't deploy app_dev.php or config.php
    location ~ ^/(app_dev|config)\.php(/|$) {
        fastcgi_pass unix:/var/run/php5-fpm.sock;
        fastcgi_split_path_info ^(.+\.php)(/.*)$;
        include fastcgi_params;
        fastcgi_param SCRIPT_FILENAME $document_root$fastcgi_script_name;
        fastcgi_param HTTPS off;
    }
    # PROD
    location ~ ^/app\.php(/|$) {
        fastcgi_pass unix:/var/run/php5-fpm.sock;
        fastcgi_split_path_info ^(.+\.php)(/.*)$;
        include fastcgi_params;
        fastcgi_param SCRIPT_FILENAME $document_root$fastcgi_script_name;
        fastcgi_param HTTPS off;
        # Prevents URIs that include the front controller. This will 404:
        # http://domain.tld/app.php/some-path
        # Remove the internal directive to allow URIs like this
        internal;
    }

    error_log /var/log/nginx/my_error.log;
    access_log /var/log/nginx/my_access.log;
}
With regard to the last two directives above: access_log represents the general requests log, while error_log is for errors, and, as with application error logs, it’s worth setting up extra monitoring to be alerted to problems so you can react quickly.
Note: This is an intentionally oversimplified nginx config file that is provided for example purposes only. It pays almost no attention to security and performance and shouldn’t be used as-is in any “real” environment.
This is what we get in /var/log/nginx/my_access.log after typing http://my.log-sandbox/app_dev.php/ in browser and hitting Enter.
192.168.56.1 - - [26/Apr/2015:16:13:28 +0300] "GET /app_dev.php/ HTTP/1.1" 200 6715 "-" "Mozilla/5.0 (Macintosh; Intel Mac OS X 10_10_3) AppleWebKit/537.36 (KHTML, like Gecko) Chrome/42.0.2311.90 Safari/537.36"
192.168.56.1 - - [26/Apr/2015:16:13:28 +0300] "GET /bundles/framework/css/body.css HTTP/1.1" 200 6657 "http://my.log-sandbox/app_dev.php/" "Mozilla/5.0 (Macintosh; Intel Mac OS X 10_10_3) AppleWebKit/537.36 (KHTML, like Gecko) Chrome/42.0.2311.90 Safari/537.36"
192.168.56.1 - - [26/Apr/2015:16:13:28 +0300] "GET /bundles/framework/css/structure.css HTTP/1.1" 200 1191 "http://my.log-sandbox/app_dev.php/" "Mozilla/5.0 (Macintosh; Intel Mac OS X 10_10_3) AppleWebKit/537.36 (KHTML, like Gecko) Chrome/42.0.2311.90 Safari/537.36"
192.168.56.1 - - [26/Apr/2015:16:13:28 +0300] "GET /bundles/acmedemo/css/demo.css HTTP/1.1" 200 2204 "http://my.log-sandbox/app_dev.php/" "Mozilla/5.0 (Macintosh; Intel Mac OS X 10_10_3) AppleWebKit/537.36 (KHTML, like Gecko) Chrome/42.0.2311.90 Safari/537.36"
192.168.56.1 - - [26/Apr/2015:16:13:28 +0300] "GET /bundles/acmedemo/images/welcome-quick-tour.gif HTTP/1.1" 200 4770 "http://my.log-sandbox/app_dev.php/" "Mozilla/5.0 (Macintosh; Intel Mac OS X 10_10_3) AppleWebKit/537.36 (KHTML, like Gecko) Chrome/42.0.2311.90 Safari/537.36"
192.168.56.1 - - [26/Apr/2015:16:13:28 +0300] "GET /bundles/acmedemo/images/welcome-demo.gif HTTP/1.1" 200 4053 "http://my.log-sandbox/app_dev.php/" "Mozilla/5.0 (Macintosh; Intel Mac OS X 10_10_3) AppleWebKit/537.36 (KHTML, like Gecko) Chrome/42.0.2311.90 Safari/537.36"
192.168.56.1 - - [26/Apr/2015:16:13:28 +0300] "GET /bundles/acmedemo/images/welcome-configure.gif HTTP/1.1" 200 3530 "http://my.log-sandbox/app_dev.php/" "Mozilla/5.0 (Macintosh; Intel Mac OS X 10_10_3) AppleWebKit/537.36 (KHTML, like Gecko) Chrome/42.0.2311.90 Safari/537.36"
192.168.56.1 - - [26/Apr/2015:16:13:28 +0300] "GET /favicon.ico HTTP/1.1" 200 6518 "http://my.log-sandbox/app_dev.php/" "Mozilla/5.0 (Macintosh; Intel Mac OS X 10_10_3) AppleWebKit/537.36 (KHTML, like Gecko) Chrome/42.0.2311.90 Safari/537.36"
192.168.56.1 - - [26/Apr/2015:16:13:30 +0300] "GET /app_dev.php/_wdt/e50d73 HTTP/1.1" 200 13265 "http://my.log-sandbox/app_dev.php/" "Mozilla/5.0 (Macintosh; Intel Mac OS X 10_10_3) AppleWebKit/537.36 (KHTML, like Gecko) Chrome/42.0.2311.90 Safari/537.36"
This shows that, for serving one page, the browser actually performs 9 HTTP calls. 7 of those, however, are requests to static content, which are plain and lightweight. However, they still take network resources and this is what can be optimized by using various sprites and minification techniques.
While those optimisations are to be discussed in another article, what’s relavant here is that we can log requests to static contents separately by using another location directive for them:
location ~ \.(jpg|jpeg|gif|png|ico|css|zip|tgz|gz|rar|bz2|pdf|txt|tar|wav|bmp|rtf|js)$ {
    access_log /var/log/nginx/my_access-static.log;
}
Remember that nginx location performs simple regular expression matching, so you can include as many static contents extensions as you expect to dispatch on your site.
Parsing such logs is no different than parsing application logs.
Other Logs Worth Mentioning
Two other PHP logs worth mentioning are the debug log and data storage log.
The Debug Log
Another convenient thing about nginx logs is the debug log. We can turn it on by replacing the error_log line of the config with the following (requires that the nginx debug module be installed):
error_log /var/log/nginx/my_error.log debug;
The same setting applies for Apache or whatever other webserver you use.
And incidentally, debug logs are not related to error logs, even though they are configured in the error_logdirective.
Although the debug log can indeed be verbose (a single nginx request, for example, generated 127KB of log data!), it can still be very useful. Wading through a log file may be cumbersome and tedious, but it can often quickly provide clues and information that greatly help accelerate the debugging process.
In particular, the debug log can really help with debugging nginx configurations, especially the most complicated parts, like location matching and rewrite chains.
Of course, debug logs should never be enabled in a production environment. The amount of space they use also and the amount of information that they store means a lot of I/O load on your server, which can degrade the whole system’s performance significantly.
Data Storage Logs
Another type of server log (useful for debugging) is data storage logs. In MySQL, you can turn them on by adding these lines:
[mysqld]
general_log = 1
general_log_file = /var/log/mysql/query.log
These logs simply contain a list of queries run by the system while serving database requests in chronological order, which can be helpful for various debugging and tracing needs. However, they should not stay enabled on production systems, since they will generate extra unnecessary I/O load, which affects performance.
Writing to Your Log Files
PHP itself provides functions for opening, writing to, and closing log files (openlog(), syslog(), and closelog(), respectively).
There are also numerous logging libraries for the PHP developer, such as Monolog (popular among Symfonyand Laravel users), as well as various framework-specific implementations, such as the logging capabilities incorporated into CakePHP. Generally, libraries like Monolog not only wrap syslog() calls, but also allow using other backend functionality and tools.
Here’s a simple example of how to write to the log:
<?php

openlog(uniqid(), LOG_ODELAY, LOG_LOCAL0);
syslog(LOG_INFO, 'It works!');
Our call here to openlog:
- configures PHP to prepend a unique identifier to each system log message within the script’s lifetime
- sets it to delay opening the syslog connection until the first
syslog()call has occurred - sets
LOG_LOCAL0as the default logging facility
Here’s what the contents of the log file would look like after running the above code:
# cat /var/log/my/info.log
Mar  2 00:23:29 log-sandbox 54f39161a2e55: It works!
Maximizing the Value of Your PHP Log Files
Now that we’re all good with theory and basics, let’s see how much we can get from logs making as few changes as possible to our sample Symfony Standard project.
First, let’s create the scripts src/log-begin.php (to properly open and configure our logs) and src/log-end.php(to log information about successful completion). Note that, for simplicity, we’ll just write all messages to the info log.
# src/log-begin.php

<?php

define('START_TIME', microtime(true));
openlog(uniqid(), LOG_ODELAY, LOG_LOCAL0);
syslog(LOG_INFO, 'BEGIN');
syslog(LOG_INFO, "URI\t{$_SERVER['REQUEST_URI']}");
$browserHash = substr(md5($_SERVER['HTTP_USER_AGENT']), 0, 7);
syslog(LOG_INFO, "CLIENT\t{$_SERVER['REMOTE_ADDR']}\t{$browserHash}"); <br />

# src/log-end.php

<?php

syslog(LOG_INFO, "DISPATCH TIME\t" . round(microtime(true) - START_TIME, 2));
syslog(LOG_INFO, 'END');
And let’s require these scripts in app.php:
<?php

require_once(dirname(__DIR__) . '/src/log-begin.php');
syslog(LOG_INFO, "MODE\tPROD");

# original app.php contents

require_once(dirname(__DIR__) . '/src/log-end.php');
For the development environment, we want to require these scripts in app_dev.php as well. The code to do so would be the same as above, except we would set the MODE to DEV rather than PROD.
We also want to track what controllers are being invoked, so let’s add one more line in Acme\DemoBundle\EventListener\ControllerListener, right at the beginning of the ControllerListener::onKernelController() method:
syslog(LOG_INFO, "CONTROLLER\t" . get_class($event->getController()[0]));
Note that these changes total a mere 15 extra lines of code, but can collectively yield a wealth of information.
Analyzing the Data in Your Log Files
For starters, let’s see how many HTTP requests are required to serve each page load.
Here’s the info in the logs for one request, based on the way we’ve configured our logging:
Mar  3 12:04:20 log-sandbox 54f58724b1ccc: BEGIN
Mar  3 12:04:20 log-sandbox 54f58724b1ccc: URI    /app_dev.php/
Mar  3 12:04:20 log-sandbox 54f58724b1ccc: CLIENT 192.168.56.1    1b101cd
Mar  3 12:04:20 log-sandbox 54f58724b1ccc: MODE   DEV
Mar  3 12:04:23 log-sandbox 54f58724b1ccc: CONTROLLER Acme\DemoBundle\Controller\WelcomeController
Mar  3 12:04:25 log-sandbox 54f58724b1ccc: DISPATCH TIME  4.51
Mar  3 12:04:25 log-sandbox 54f58724b1ccc: END
Mar  3 12:04:25 log-sandbox 54f5872967dea: BEGIN
Mar  3 12:04:25 log-sandbox 54f5872967dea: URI    /app_dev.php/_wdt/59b8b6
Mar  3 12:04:25 log-sandbox 54f5872967dea: CLIENT 192.168.56.1    1b101cd
Mar  3 12:04:25 log-sandbox 54f5872967dea: MODE   DEV
Mar  3 12:04:28 log-sandbox 54f5872967dea: CONTROLLER Symfony\Bundle\WebProfilerBundle\Controller\ProfilerController
Mar  3 12:04:29 log-sandbox 54f5872967dea: DISPATCH TIME  4.17
Mar  3 12:04:29 log-sandbox 54f5872967dea: END
So now we know that each page load is actually served with two HTTP requests.
Actually there are two points worth mentioning here. First, the two requests per page load is for using Symfony in dev mode (which I have done throughout this article). You can identify dev mode calls by searching for /app-dev.php/ URL chunks. Second, let’s say each page load is served with two subsequent requests to the Symfony app. As we saw earlier in the nginx access logs, there are actually more HTTP calls, some of which are for static content.
OK, now let’s surf a bit on the demo site (to build up the data in the log files) and let’s see what else we can learn from these logs.
How many requests were served in total since the beginning of the logfile?
# grep -c BEGIN info.log
10
Did any of them fail (did the script shut down without reaching the end)?
# grep -c END info.log
10
We see that the number of BEGIN and END records match, so this tells us that all of the calls were successful. (If the PHP script had not completed successfully, it would not have reached execution of the src/log-end.phpscript.)
What was the percentage of requests to the site root?
# `grep -cE "\s/app_dev.php/$" info.log`
2
This tells us that there were 2 page loads of the site root. Since we previously learned that (a) there are 2 requests to the app per page load and (b) there were a total of 10 HTTP requests, the percentage of requests to the site root was 40% (i.e., 2×2/10).
Which controller class is responsible for serving requests to site root?
# grep -E "\s/$|\s/app_dev.php/$" info.log | head -n1
Mar  3 12:04:20 log-sandbox 54f58724b1ccc: URI  /app_dev.php/

# grep 54f58724b1ccc info.log | grep CONTROLLER
Mar  3 12:04:23 log-sandbox 54f58724b1ccc: CONTROLLER   Acme\DemoBundle\Controller\WelcomeController
Here we used the unique ID of a request to check all log messages related to that single request. We thereby were able to determine that the controller class responsible for serving requests to site root is Acme\DemoBundle\Controller\WelcomeController.
Which clients with IPs of subnet
192.168.0.0/16have accessed the site?
# grep CLIENT info.log | cut -d":" -f4 | cut -f2 | sort | uniq
192.168.56.1
As expected in this simple test case, only my host computer has accessed the site. This is of course a very simplistic example, but the capability that it demonstrates (of being able to analyse the sources of the traffic to your site) is obviously quite powerful and important.
How much of the traffic to my site has been from FireFox?
Having 1b101cd as the hash of my Firefox User-Agent, I can answer this question as follows:
# grep -c 1b101cd info.log
8
# grep -c CLIENT info.log
10
Answer: 80% (i.e., 8/10)
What is the percentage of requests that yielded a “slow” response?
For purposes of this example, we’ll define “slow” as taking more than 5 seconds to provide a response. Accordingly:
# grep "DISPATCH TIME" info.log | grep -cE "\s[0-9]{2,}\.|\s[5-9]\."
2
Answer: 20% (i.e., 2/10)
Did anyone ever supply GET parameters?
# grep URI info.log | grep \?
No, Symfony standard uses only URL slugs, so this also tells us here that no one has attempted to hack the site.
These are just a handful of relatively rudimentary examples of the ways in which logs files can be creatively leveraged to yield valuable usage information and even basic analytics.
Other Things to Keep in Mind
Keeping Things Secure
Another heads-up is for security. You might think that logging requests is a good idea, in most cases it indeed is. However, it’s important to be extremely careful about removing any potentially sensitive user information before storing it in the log.
Fighting Log File Bloat
Since log files are text files to which you always append information, they are constantly growing. Since this is a well-known issue, there are some fairly standard approaches to controlling log file growth.
The easiest is to rotate the logs. Rotating logs means:
- Periodically replacing the log with a new empty file for further writing
- Storing the old file for history
- Removing files that have “aged” sufficiently to free up disk space
- Making sure the application can write to the logs uniterrupted when these file changes occur
The most common solution for this is logrotate, which ships pre-installed with most *nix distributions. Let’s see a simple configuration file for rotating our logs:
/var/log/my/debug.log
/var/log/my/info.log
/var/log/my/warning.log
/var/log/my/error.log
{
    rotate 7
    daily
    missingok
    notifempty
    delaycompress
    compress
    sharedscripts
    postrotate
        invoke-rc.d rsyslog rotate > /dev/null
    endscript
}
Another, more advanced approach is to make rsyslogd itself write messages into files, dynamically created based on current date and time. This would still require a custom solution for removal of older files, but lets devops manage timeframes for each log file precisely. For our example:
$template DynaLocal0Err,        "/var/log/my/error-%$NOW%-%$HOUR%.log"
$template DynaLocal0Info,       "/var/log/my/info-%$NOW%-%$HOUR%.log"
$template DynaLocal0Warning,    "/var/log/my/warning-%$NOW%-%$HOUR%.log"
$template DynaLocal0Debug,      "/var/log/my/debug-%$NOW%-%$HOUR%.log"
local1.err      -?DynaLocal0Err
local1.info     -?DynaLocal0Info
local1.warning  -?DynaLocal0Warning
local1.debug    -?DynaLocal0Debug
This way, rsyslog will create an individual log file each hour, and there won’t be any need for rotating them and restarting the daemon. Here’s how log files older than 5 days can be removed to accomplish this solution:
find /var/log/my/ -mtime +5 -print0 | xargs -0 rm
Remote Logs
As the project grows, parsing information from logs gets more and more resource hungry. This not only means creating extra server load; it also means creating peak load on the CPU and disk drives at the times when you parse logs, which can degrade server response time for users (or in a worst case can even bring the site down).
To solve this, consider setting up a centralized logging server. All you need for this is another box with UDP port 514 (default) open. To make rsyslogd listen to connections, add the following line to its config file:
$UDPServerRun 514
Having this, setting up the client is then as easy as:
*.* @HOSTNAME:514
(where HOSTNAME is the host name of your remote logging server).
Conclusion
While this article has demonstrated some of the creative ways in which log files can offer way more valuable information than you may have previously imagined, it’s important to emphasize that we’ve only scratched the surface of what’s possible. The extent, scope, and format of what you can log is almost limitless. This means that – if there’s usage or analytics data you want to extract from your logs – you simply need to log it in a way that will make it easy to subsequently parse and analyze. Moreover, that analysis can often be performed with standard Linux command line tools like grep, sed, or awk.
Indeed, PHP log files are a most powerful tool that can be of tremendous benefit.
Resources
Code on GitHub: https://github.com/isanosyan/toptal-blog-logs-post-example
Appendix: Reading and Manipulating Log Files in the Unix Shell
Here is a brief intro to some of the more common *nix command line tools that you’ll want to be familiar with for reading and manipulating your log files.
catis perhaps the most simple one. It prints the whole file to the output stream. For example, the following command will printlogfile1to the console:cat logfile1>character allows user to redirect output, for example into another file. Opens target stream in write mode (which means wiping target contents). Here’s how we replace contents oftmpfilewith contents oflogfile1:cat logfile1 > tmpfile>>redirects output and opens target stream in append mode. Current contents of target file will be preserved, new lines will be added to the bottom. This will appendlogfile1contents totmpfile:cat logfile1 >> tmpfilegrepfilters file by some pattern and prints only matching lines. Command below will only print lines oflogfile1containingBingomessage:grep Bingo logfile1cutprints contents of a single column (by number starting from 1). By default searches for tab characters as delimiters between column. For example, if you have file full of timestamps in formatYYYY-MM-DD HH:MM:SS, this will allow you to print only years:cut -d"-" -f1 logfile1headdisplays only the first lines of a filetaildisplays only the last lines of a filesortsorts lines in the outputuniqfilters out duplicate lineswccounts words (or lines when used with the-lflag)|(i.e., the “pipe” symbol) supplies output from one command as input to the next. Pipe is very convenient for combining commands. For example, here’s how we can find months of 2014 that occur within a set of timestamps:grep -E "^2014" logfile1 | cut -d"-" -f2 | sort | uniq
Here we first match lines against regular expression “starts with 2014”, then cut months. Finally, we use combination of sort and uniq to print occurrences only once.
REST Security with JWT using Java and Spring Security
The following article is a guest post from Toptal. Toptal is an elite network of freelancers that enables businesses to connect with the top 3% of software engineers and designers in the world.
Security
Security is the enemy of convenience, and vice versa. This statement is true for any system, virtual or real, from the physical house entrance to web banking platforms. Engineers are constantly trying to find the right balance for the given use case, leaning to one side or the other. Usually, when a new threat appears, we move towards security and away from convenience. Then, we see if we can recover some lost convenience without reducing the security too much. Moreover, this vicious circle goes on forever.

Let’s try to see where REST services currently stand regarding security and convenience. REST (which stands for Representational State Transfer) services started off as an extremely simplified approach to Web Services that had huge specifications and cumbersome formats, such as WSDL for describing the service, or SOAP for specifying the message format. In REST, we have none of those. We can describe the REST service in a plain text file and use any message format we want, such as JSON, XML or even plain text again. The simplified approach was applied to the security of REST services as well; no defined standard imposes a particular way to authenticate users.
Although REST services do not have much specified, an important one is the lack of state. It means the server does not keep any client state, with sessions as a good example. Thus, the server replies to each request as if it was the first the client has made. However, even now, many implementations still use cookie based authentication, which is inherited from standard website architectural design. The stateless approach of REST makes session cookies inappropriate from the security standpoint, but nevertheless, they are still widely used. Besides ignoring the required statelessness, simplified approach came as an expected security trade-off. Compared to the WS-Security standard used for Web Services, it is much easier to create and consume REST services, hence convenience went through the roof. The trade-off is pretty slim security; session hijacking and cross-site request forgery (XSRF) are the most common security issues.
In trying to get rid of client sessions from the server, some other methods have been used occasionally, such as Basic or Digest HTTP authentication. Both use an Authorization header to transmit user credentials, with some encoding (HTTP Basic) or encryption (HTTP Digest) added. Of course, they carried the same flaws found in websites: HTTP Basic had to be used over HTTPS since username and password are sent in easily reversible base64 encoding, and HTTP Digest forced the use of obsolete MD5 hashing that is proven to be insecure.
Finally, some implementations used arbitrary tokens to authenticate clients. This option seems to be the best we have, for now. If implemented properly, it fixes all the security problems of HTTP Basic, HTTP Digest or session cookies, it is simple to use, and it follows the stateless pattern.
However, with such arbitrary tokens, there’s little standard involved. Every service provider had his or her idea of what to put in the token, and how to encode or encrypt it. Consuming services from different providers required additional setup time, just to adapt to the specific token format used. The other methods, on the other hand (session cookie, HTTP Basic and HTTP Digest) are well known to developers, and almost all browsers on all devices work with them out of the box. Frameworks and languages are ready for these methods, having built-in functions to deal with each seamlessly.
JWT
JWT (shortened from JSON Web Token) is the missing standardization for using tokens to authenticate on the web in general, not only for REST services. Currently, it is in draft status as RFC 7519. It is robust and can carry a lot of information, but is still simple to use even though its size is relatively small. Like any other token, JWT can be used to pass the identity of authenticated users between an identity provider and a service provider (which are not necessarily the same systems). It can also carry all the user’s claim, such as authorization data, so the service provider does not need to go into the database or external systems to verify user roles and permissions for each request; that data is extracted from the token.
Here is how JWT is designed to work:

- Clients logs in by sending their credentials to the identity provider.
- The identity provider verifies the credentials; if all is OK, it retrieves the user data, generates a JWT containing user details and permissions that will be used to access the services, and it also sets the expiration on the JWT (which might be unlimited).
- Identity provider signs, and if needed, encrypts the JWT and sends it to the client as a response to the initial request with credentials.
- Client stores the JWT for a limited or unlimited amount of time, depending on the expiration set by the identity provider.
- Client sends the stored JWT in an Authorization header for every request to the service provider.
- For each request, the service provider takes the JWT from the
Authorizationheader and decrypts it, if needed, validates the signature, and if everything is OK, extracts the user data and permissions. Based on this data solely, and again without looking up further details in the database or contacting the identity provider, it can accept or deny the client request. The only requirement is that the identity and service providers have an agreement on encryption so that service can verify the signature or even decrypt which identity was encrypted.
This flow allows for great flexibility while still keeping things secure and easy to develop. By using this approach, it is easy to add new server nodes to the service provider cluster, initializing them with only the ability to verify the signature and decrypt the tokens by providing them a shared secret key. No session replication, database synchronization or inter-node communication is required. REST in its full glory.
The main difference between JWT and other arbitrary tokens is the standardization of the token’s content. Another recommended approach is to send the JWT token in the Authorization header using the Bearer scheme. The content of the header should look like this:
Authorization: Bearer <token>
Implementation
For REST services to work as expected, we need a slightly different authorization approach compared to classic, multi-page websites.
Instead of triggering the authentication process by redirecting to a login page when a client requests a secured resource, the REST server authenticates all requests using the data available in the request itself, the JWT token in this case. If such an authentication fails, redirection makes no sense. The REST API simply sends an HTTP code 401 (Unauthorized) response and clients should know what to do; for example, a browser will show a dynamic div to allow the user to supply the username and password.
On the other hand, after a successful authentication in classic, multi-page websites, the user is redirected by using HTTP code 301 (Moved permanently), usually to a home page or, even better, to the page the user initially requested that triggered the authentication process. With REST, again this makes no sense. Instead we would simply continue with the execution of the request as if the resource was not secured at all, return HTTP code 200 (OK) and expected response body.
Spring Security

Now, let’s see how can we implement the JWT token based REST API using Java and Spring, while trying to reuse the Spring security default behavior where we can. As expected, Spring Security framework comes with many ready to plug-in classes that deal with “old” authorization mechanisms: session cookies, HTTP Basic, and HTTP Digest. However, it lacks the native support for JWT, and we need to get our hands dirty to make it work.
First, we start with the usual Spring Security filter definition in web.xml:
<filter>
	<filter-name>springSecurityFilterChain</filter-name>
	<filter-class>org.springframework.web.filter.DelegatingFilterProxy</filter-class>
</filter>
<filter-mapping>
	<filter-name>springSecurityFilterChain</filter-name>
	<url-pattern>/*</url-pattern>
</filter-mapping>
Note that the name of the filter must be exactly springSecurityFilterChain for the rest of the Spring config to work out of the box.
Next comes the XML declaration of the Spring beans related to security. In order to simplify the XML, we will set the default namespace to security by adding xmlns="http://www.springframework.org/schema/security" to the root XML element. The rest of the XML looks like this:
    <global-method-security pre-post-annotations="enabled" />  (1)

    <http pattern="/api/login" security="none"/>   (2)
    <http pattern="/api/signup" security="none"/>

    <http pattern="/api/**" entry-point-ref="restAuthenticationEntryPoint" create-session="stateless"> (3)
        <csrf disabled="true"/>  (4)
        <custom-filter before="FORM_LOGIN_FILTER" ref="jwtAuthenticationFilter"/>  (5)
    </http>

    <beans:bean id="jwtAuthenticationFilter" class="com.toptal.travelplanner.security.JwtAuthenticationFilter">  (6)
        <beans:property name="authenticationManager" ref="authenticationManager" />
        <beans:property name="authenticationSuccessHandler" ref="jwtAuthenticationSuccessHandler" />  (7)
    </beans:bean>

    <authentication-manager alias="authenticationManager">
        <authentication-provider ref="jwtAuthenticationProvider" />  (8)
    </authentication-manager>
- (1) In this line, we activate
@PreFilter,@PreAuthorize,@PostFilter,@PostAuthorizeannotations on any spring beans in the context. - (2) We define the login and signup endpoints to skip security; even “anonymous” should be able to do these two operations.
- (3) Next, we define the filter chain applied to all requests while adding two important configs: Entry point reference and setting the session creation to
stateless(we do not want the session created for security purposes as we are using tokens for each request). - (4) We do not need
csrfprotection because our tokens are immune to it. - (5) Next, we plug in our special authentication filter within the Spring’s predefined filter chain, just before the form login filter.
- (6) This bean is the declaration of our authentification filter; since it is extending Spring’s
AbstractAuthenticationProcessingFilter, we need to declare it in XML to wire its properties (auto wire does not work here). We will explain later what the filter does. - (7) The default success handler of
AbstractAuthenticationProcessingFilteris not good enough for REST purposes because it redirects the user to a success page; that is why we set our own here. - (8) The declaration of the provider created by the
authenticationManageris used by our filter to authenticate users.
Now let’s see how we implement the specific classes declared in the XML above. Note that Spring will wire them for us. We start with the simplest ones.
RestAuthenticationEntryPoint.java
public class RestAuthenticationEntryPoint implements AuthenticationEntryPoint {

    @Override
    public void commence(HttpServletRequest request, HttpServletResponse response, AuthenticationException authException) throws IOException {
        // This is invoked when user tries to access a secured REST resource without supplying any credentials
        // We should just send a 401 Unauthorized response because there is no 'login page' to redirect to
        response.sendError(HttpServletResponse.SC_UNAUTHORIZED, "Unauthorized");
    }
}
As explained above, this class just returns HTTP code 401 (Unauthorized) when authentication fails, overriding default Spring’s redirecting.
JwtAuthenticationSuccessHandler.java
public class JwtAuthenticationSuccessHandler implements AuthenticationSuccessHandler {

    @Override
    public void onAuthenticationSuccess(HttpServletRequest request, HttpServletResponse response, Authentication authentication) {
        // We do not need to do anything extra on REST authentication success, because there is no page to redirect to
    }

}
This simple override removes the default behavior of a successful authentication (redirecting to home or any other page the user requested). If you are wondering why we do not need to override the AuthenticationFailureHandler, it is because default implementation will not redirect anywhere if its redirect URL is not set, so we just avoid setting the URL, which is good enough.
JwtAuthenticationFilter.java
public class JwtAuthenticationFilter extends AbstractAuthenticationProcessingFilter {

    public JwtAuthenticationFilter() {
        super("/**");
    }

    @Override
    protected boolean requiresAuthentication(HttpServletRequest request, HttpServletResponse response) {
        return true;
    }

    @Override
    public Authentication attemptAuthentication(HttpServletRequest request, HttpServletResponse response) throws AuthenticationException {

        String header = request.getHeader("Authorization");

        if (header == null || !header.startsWith("Bearer ")) {
            throw new JwtTokenMissingException("No JWT token found in request headers");
        }

        String authToken = header.substring(7);

        JwtAuthenticationToken authRequest = new JwtAuthenticationToken(authToken);

        return getAuthenticationManager().authenticate(authRequest);
    }

    @Override
    protected void successfulAuthentication(HttpServletRequest request, HttpServletResponse response, FilterChain chain, Authentication authResult)
            throws IOException, ServletException {
        super.successfulAuthentication(request, response, chain, authResult);

        // As this authentication is in HTTP header, after success we need to continue the request normally
        // and return the response as if the resource was not secured at all
        chain.doFilter(request, response);
    }
}
This class is the entry point of our JWT authentication process; the filter extracts the JWT token from the request headers and delegates authentication to the injected AuthenticationManager. If the token is not found, an exception is thrown that stops the request from processing. We also need an override for successful authentication because the default Spring flow would stop the filter chain and proceed with a redirect. Keep in mind we need the chain to execute fully, including generating the response, as explained above.
JwtAuthenticationProvider.java
public class JwtAuthenticationProvider extends AbstractUserDetailsAuthenticationProvider {

    @Autowired
    private JwtUtil jwtUtil;

    @Override
    public boolean supports(Class<?> authentication) {
        return (JwtAuthenticationToken.class.isAssignableFrom(authentication));
    }

    @Override
    protected void additionalAuthenticationChecks(UserDetails userDetails, UsernamePasswordAuthenticationToken authentication) throws AuthenticationException {
    }

    @Override
    protected UserDetails retrieveUser(String username, UsernamePasswordAuthenticationToken authentication) throws AuthenticationException {
        JwtAuthenticationToken jwtAuthenticationToken = (JwtAuthenticationToken) authentication;
        String token = jwtAuthenticationToken.getToken();

        User parsedUser = jwtUtil.parseToken(token);

        if (parsedUser == null) {
            throw new JwtTokenMalformedException("JWT token is not valid");
        }

        List<GrantedAuthority> authorityList = AuthorityUtils.commaSeparatedStringToAuthorityList(parsedUser.getRole());

        return new AuthenticatedUser(parsedUser.getId(), parsedUser.getUsername(), token, authorityList);
    }

}
In this class, we are using Spring’s default AuthenticationManager, but we inject it with our own AuthenticationProvider that does the actual authentication process. To implement this, we extend the AbstractUserDetailsAuthenticationProvider, which requires us only to return UserDetails based on the authentication request, in our case, the JWT token wrapped in the JwtAuthenticationToken class. If the token is not valid, we throw an exception. However, if it is valid and decryption by JwtUtil is successful, we extract the user details (we will see exactly how in the JwtUtil class), without accessing the database at all. All the information about the user, including his or her roles, is contained in the token itself.
JwtUtil.java
public class JwtUtil {

    @Value("${jwt.secret}")
    private String secret;

    /**
     * Tries to parse specified String as a JWT token. If successful, returns User object with username, id and role prefilled (extracted from token).
     * If unsuccessful (token is invalid or not containing all required user properties), simply returns null.
     *
     * @param token the JWT token to parse
     * @return the User object extracted from specified token or null if a token is invalid.
     */
    public User parseToken(String token) {
        try {
            Claims body = Jwts.parser()
                    .setSigningKey(secret)
                    .parseClaimsJws(token)
                    .getBody();

            User u = new User();
            u.setUsername(body.getSubject());
            u.setId(Long.parseLong((String) body.get("userId")));
            u.setRole((String) body.get("role"));

            return u;

        } catch (JwtException | ClassCastException e) {
            return null;
        }
    }

    /**
     * Generates a JWT token containing username as subject, and userId and role as additional claims. These properties are taken from the specified
     * User object. Tokens validity is infinite.
     *
     * @param u the user for which the token will be generated
     * @return the JWT token
     */
    public String generateToken(User u) {
        Claims claims = Jwts.claims().setSubject(u.getUsername());
        claims.put("userId", u.getId() + "");
        claims.put("role", u.getRole());

        return Jwts.builder()
                .setClaims(claims)
                .signWith(SignatureAlgorithm.HS512, secret)
                .compact();
    }
}
Finally, JwtUtil class is in charge of parsing the token into User object and generating the token from the User object. It is straightforward since it uses the jjwt library to do all the JWT work. In our example, we simply store the username, user ID and user roles in the token. We could also store more arbitrary stuff and add more security features, such as the token’s expiration. Parsing of the token is used in the AuthenticationProvider as shown above. The generateToken() method is called from login and signup REST services, which are unsecured and will not trigger any security checks or require a token to be present in the request. In the end, it generates the token that will be returned to the clients, based on the user.
Conclusion
Although the old, standardized security approaches (session cookie, HTTP Basic, and HTTP Digest) will work with REST services as well, they all have problems that would be nice to avoid by using a better standard. JWT arrives just in time to save the day, and most importantly it is very close to becoming an IETF standard.
JWT’s main strength is handling user authentication in a stateless, and therefore scalable, way, while keeping everything secure with up-to-date cryptography standards. Storing claims (user roles and permissions) in the token itself creates huge benefits in distributed system architectures where the server that issues the request has no access to the authentication data source.
Cloud Security: Is it Safe Enough for You?
Cloud computing is a service that is increasing rapidly in popularity, and companies are expanding to match that demand. Forbes reports that 42 percent of major IT decision makers are planning to increase spending on cloud computing. That spending is expected to reach $32 billion for the year 2015.
Yet while the services are popular, there have been some major breaches in the last few years. While some of them haven’t directly affected you and others only really affected celebrities, it makes one asks questions. Are cloud services really safe? Are they something you can trust your most sensitive data with?
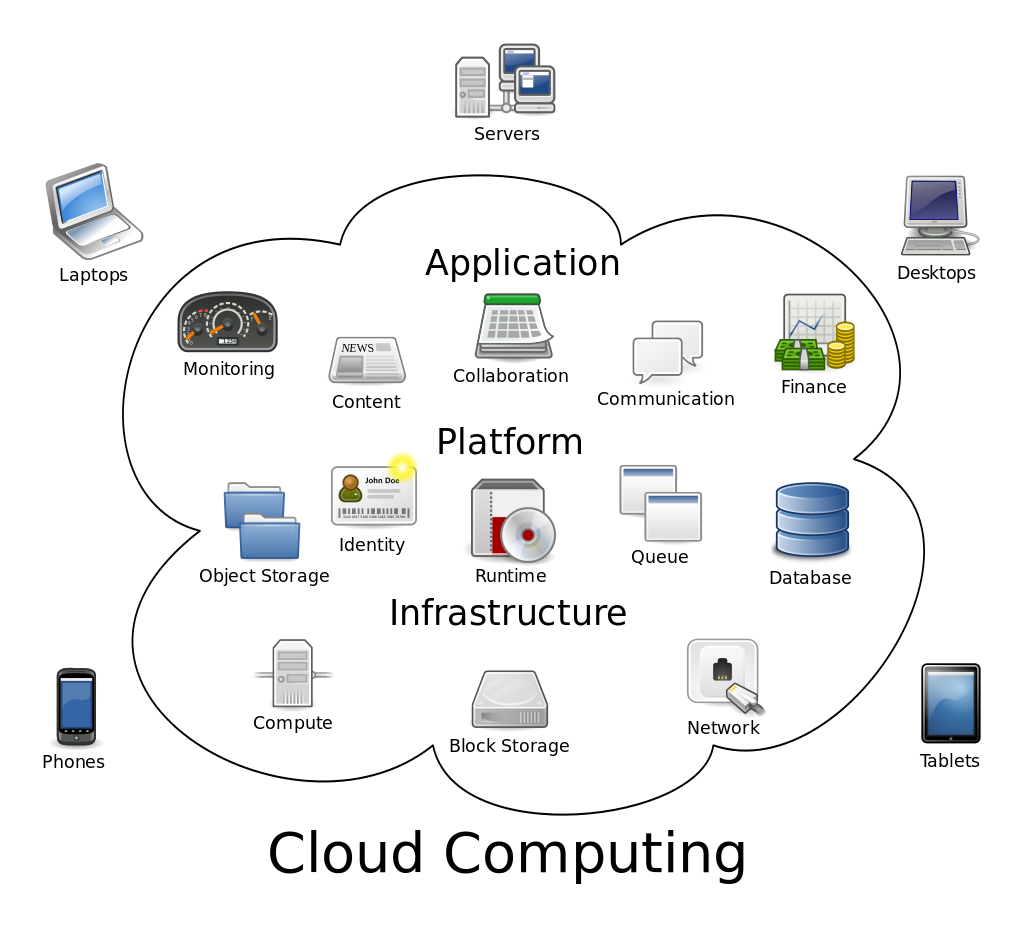
“Cloud computing” by Dynamicwork under CC BY-SA 3.0
This is a basic graphic of what cloud computer is all about, but as you can see there are quite a few thinks that go in and out of the cloud. Do you want your data to be included?
Pros and Cons of the Situation Today
The first realization you have to make is that your data is going to be out of your control in a fundamental way. You can make sure there isn’t a leak on your end, but if someone hacks the servers, it is out of your hands. It also isn’t encouraging that cloud service providers have profit in mind as their top priority. This means that they might trim the budget or try to cut corners when it comes to security. They often look to prepare for the next threat, not three threats ahead, as they should.
Back to a simple question: can you trust them? Take a look at the following pros and cons and decide whether it is right for you.
Pros
- Most hackers attacking cloud systems are only interested in going after major industries and data centers with valuable information. They are unlikely to want your individual information or want to comb through all of your documents to find it.
- While it is easier to attack an endpoint, such as a user, the price an average hacker could get for your information is simply not worth the time expenditure that the hacker would put in.
- While governments certainly have not stopped their surveillance in the past year or two, the recent disclosure of the extensive surveillance programs, such as PRISM, conducted by certain countries have forced them to taper off their ambitions. This means that you are less likely to be spied upon during your use of cloud services.
- Even if it just to maintain a good reputation, all of the major players in cloud computing and storage will agree that security is an important issue. This means that they will be competing with each other for the title of “most secure.”
Cons
- In 2014, Dropbox changed its terms of use to stop class action lawsuits, and then gave everyone 30 days to opt out of arbitration.
- Note that this Dropbox document is currently (as of August 2015) about 2,000 words, but still very few people read it.
- Nearly every major service has had one problem or another during its lifetime.
- This is only counting the ones we know about.
How to Make Your Decision
Now knowing all that you do, take the following steps to determine whether you should use cloud services or an alternative option.
- Determine your needs. Do you have a lot of items or documents to store, or are you working from home and have vital business interests to protect? If you have some sensitive data, it might be best stored on a flash drive where it is under your control.
- Determine the service you might use. Try to research more about that company. Read any agreements beforehand and then sleep on it for a day or two. Compare services in terms of both security record and storage space.
- Consider the costs. If you want to store a great deal of data that you don’t plan on using too often, then you might be better off getting a form of physical storage instead of paying for a cloud service.
- Are you going to be sharing files or data with people? If so, then cloud solutions are probably best for you. Some services such as Dropbox are optimized for sharing, but you do need to be careful about who you share your folders with. Experts across the board say that human error is the number one cause of data leaks.
Additional Considerations
In addition to the above factors and tips for deciding whether the security measures put in place by cloud services are enough, there are few other things that you should know about as well.
- Cloud security on your end is highly dependent on the general security of your online accounts and your computer. If you have a quality password, such as “Tr!yzxp176,” and have an up to date computer with the best anti-malware you can get, then you will have a significantly lower chance of experiencing a breach. Take this into your account when making your decision (or follow these tips anyway, as they are universally helpful).
- If you are going to be using cloud services, then you should acquire the services of a Virtual Private Network for your computer. This service will connect your computer to an offsite secure server using an encrypted connection. This will protect you from surveillance and data interception on unprotected public networks.As an example of how this works, imagine that you are using cloud services in a café. Normally a hacker could open their laptop a half a dozen tables away, start up a small device, and intercept either the files being transferred or the username and password data for the account you are using. With a VPN your data will safely travel through and encrypted “tunnel” that is created around your connection, allowing no one access over the network.
Cloud computing is said to be secure, but remember that there is always a way to break in, even if it hasn’t been invented yet.
Conclusion
Have you come to a decision yet? I hope that you have, and while these tips can help you and give you all the facts that you need to make a decision, only you can make the final call about whether to use cloud services or not. Thank you for reading, and regardless of your decision may you never have to deal with a leak of your personal information.
About the Author: Cassie Phillips is an internet security specialist who likes to take a particular focus on the individual and how internet security can affect their day to day life. She loves to blog and is glad that she can share this important information about cloud computing with you.
Data and Web Security in Business
Not all businesses are aware of just how much of their data is potentially at risk within their own systems and even their website; there simply isn’t the education in place to identify the flaws in one’s system before it’s too late in most cases, which results in compromised data, stolen data, loss of trust from customers and potentially a loss of funds or profits for the business in question; usually because of issues that could have easily been avoided.
First of all you need to secure the internal workings of your business; which means users and data storage. One of the biggest threats to your computer and data security systems is actually the people that you give access to those systems; the human element is less predictable so be sure to take the necessary precautions that will prevent or limit damages should an employee choose to act maliciously. Start by ensuring logins are required and are unique to each user, this allows you to control exactly what each person has access to, and means that it is easier to trace who is responsible if damage is caused. You should also be very careful about providing permissions to these users; consider what they absolutely must have access to, and why, and consider whether or not they really need access to everything they can access. Limitations are the first step towards protection.
Once you have this much protected you can start to think about how to avoid unauthorised access; password protecting everything is a good start, and encrypting sensitive information can be a fantastic way to avoid giving away data that is particularly valuable to your company. These are generally very easy systems to implement, and most security organisations you may choose to work with will help you to set up systems for encryption, data recovery, remote destruction (allowing you to delete data on a stolen device), as well as other aspects of data protections that can be very important to your business. These are important if your business handles a great deal of sensitive information, and of course if that is the case and security is of particularly importance you will want to get a security firm to help you protect it, however in a lot of cases your own IT department can set up the encryption, passwords, firewalls and defences needed to protect basic levels of data against reasonably tough attacks.
Of course your online systems can require something a little different in order to keep them safe, and this is true of your website as well as any online content management, project management or other systems you might be using in the day to day running of your business. Again it is important that everything is password protected to keep things safe and secure as far as your users and their access levels are concerned, but you should also ensure that the development of the websites and tools are done with a certain level of security in mind. There are some rules to this, but in general it isn’t too difficult if you can already develop a website.
No WordPress. If you want a secure website to handle lots of valuable data then WordPress isn’t for you, no matter how easy you think it makes your life. The problem with WordPress is that literally anyone can get it, and they all get the same version. Within a short time the vulnerabilities of that version will have been discovered and likely shared among hackers and other such people, meaning that you can either update or remain vulnerable – your only hope is that WordPress and you update often enough to stay one step ahead of the hackers. This is an issue that exists with a variety of similar platforms and would be difficult to keep yourself secure using these platforms – the best option is to use a secure platform and your own web development team or company.
The variations in the programming that come from using your own team help to create diversity online, which means that it is much harder for hackers and malicious users to find the ways into your system; thus keeping you protected for longer. Of course even with your own website you are likely to be working with systems like Magento for database integration and content management, which will need to be updated every so often but are considerably more secure than systems like WordPress, and you will have to keep certificates up to date, particularly your SSL certificates.
Kate Critchlow is a freelance writer with a passionate interest for technology covering everything from web development to IT security services.